When I first laid eyes on a set of vertical stripes, I knew I wanted them. I wanted them badly, but I didn’t know how to approach the project because of its complexity. It was equal parts algebra, geometry, and painting. Even more importantly, this project required finesse and patience. I couldn’t rush through or wing it.

Let’s plan!! I started with the math. I measured the wall horizontally for a total of 145 inches. I then had to find an odd number of equally sized stripes. You want to use an odd number so that your stripes start and end with the same color, making your wall appear symmetrical. It’s best for the darker color to appear on each end. I did this by dividing 145/n until I came up with 8.5 inches (17 stripes of 8.5 inches each). If you have an inch or two extra, just add it to the end stripes. You don’t want stripes that are 8.2 inches or 8.3 inches because that type of precision measuring is not easily executed.
I then designed my wall in Microsoft Excel to get a visual of the layout. I used a column width of 8.5 (you can also use Google Spreadsheets) to mimic the wall and shaded alternating stripes in their corresponding colors. From this diagram, I was able to answer these questions: were the stripes too thick, was the wall too busy, did I somehow mess up the math and end up with a different color on each end?
Once you create your spreadsheet diagram, use it as a guide in your project. Print it out and reference the measurements for each line. For example, I noted measurements at 8.5, 17 and , 35.5 inches, all 8.5 inch increments. Note: If you need help finding the correct stripe width for your wall or creating the diagram, just leave me a comment and I’m happy to help you brainstorm.
Let’s go shopping!! Once you’ve planned out your wall, make sure you have the following supplies:
- 2 inch painter’s tape (I would buy two rolls)
- A high quality roller that has a width adequate for covering your stripe completely
- A paint pan for your roller
- An angled paint brush
- A few throw cloths to cover furniture and your floor
- A ladder tall enough to reach the ceiling
- Your paint : )
- Most important item: a laser level. Here’s the one I purchased for ~$20: http://www.ryobitools.com/catalog/airgrip/electronic_hand_tools/ELL1001
Let’s tape!!! You’ll want to clear all furniture from in front of the wall and leave yourself a decent amount of floor clearance. Tape the ceiling to protect it from brush and roller marks. Do the same on the wall adjacent to where your stripes will end, so on the far left and far right. Lastly, protect your baseboards from brush and roller marks by taping over your baseboards. Make sure your edges are clean for each of these tape locations since these will be visual lines.
Let’s measure! You’re ready to begin measuring and marking the wall itself. Jump on your ladder and begin making small penciled marks for each stripe as close to the ceiling as possible. I used a measuring level like this one: http://www.amazon.com/Johnson-Level-Tool-J236-Yardstick/dp/B000BPFYTG. Measure slowly and carefully since this is the only mark you will make to designate your stripes. Limit the number of times you need to reposition the level. This is where your diagram with measurement marks comes in handy. You can make marks at 8.5, 17, 35.5, etc. instead of measuring freshly from each mark. This helps to reduce error and variations in stripe width. Once done measuring, go back and repeat each step to double-check your marks.
Love your laser level!! It’s best to have a dark room when using the laser since the darker the room, the brighter the line. This makes taping easier. To begin taping your stripes, place your laser level pointed downwards from the first mark on the wall until the your laser line is straight. Leave the laser level ON with the line illuminated and begin taping starting from the ceiling. At this point, the laser level should be attached to the wall (suctioned), so you don’t need to hold it. Tape from the left outer edge of the laser line all the way to the floor.

Make sure your tape overlaps with the tape you laid on the baseboard. Repeat this same step for every single stripe, making sure you are taping on the correct side of the stripe. So, for stripe one, tape will be laid on the left side of the laser line and for the second stripe, your tape will be laid on the right side of the laser line. Make sure your tape carries all the way from the ceiling to the floor. You may need to continue the line from the ceiling to the existing tape depending on where your laser level was positioned. You can do this by making a faint line using your measuring level (not laser level), then taping.
Let’s paint!! I learned an amazing trick when it came to painting the wall in order to avoid any seepage underneath the tape. What you want to do is paint over the edge of every single piece of tape (for those stripes you will actually be painting, remember alternating stripes). Using your angled brush, you want to paint into the corners and along the edge of the ceiling and the baseboard. Use two coats at the edge of the walls, ceiling, and baseboard since you won’t be able to reach these areas with your roller. Let the paint fully dry, preferably overnight.
You’re ready to paint your stripes! Fill up the roller pan with paint and saturate the roller, cover each stripe starting with the ceiling and following down to the floor. Try to overlap the areas that were painted with the angled brush to minimize any variations in texture. Repeat this for every stripe and let paint dry overnight. Repeat painting the stripes until your wall looks like this:  All the hard work has been completed and you can now basque in the glory of your hard work while the paint dries completely. Let the paint dry for three days before removing the tape. You want to make sure that the tape comes off easily without pulling any soft paint off with it. After three days, carefully pull off the paint and stare there in awe of your accomplishment.

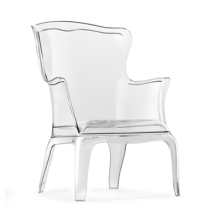
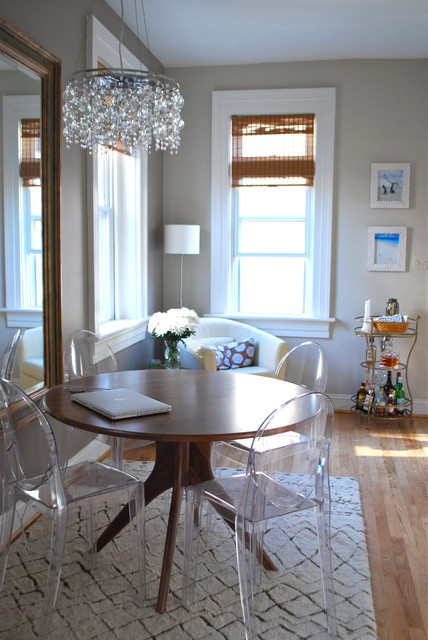
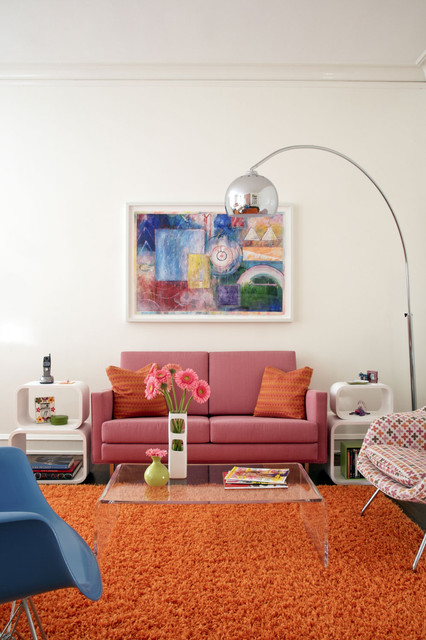
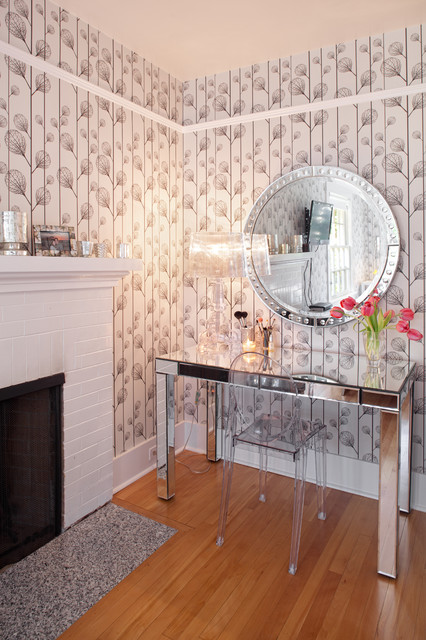
 My living room is only 14 feet by 12 feet, so I need as much “freeing” of space as possible. I am currently using a Kartell Ghost Chair as a side chair, a Pasha Chair by Pedrali as another larger side chair, and I have a unique Italian coffee table in acrylic. With these three pieces, the room looks airy, bright, and has reflective properties that also create visual space.